

We people love to Eat. Right! In this modern era, we always seek different types of tastes and flavors. That’s why Restaurants are now becoming more and more professional day by day. To be a perfect dining hall and impact the area, you must need a Restaurant Website.
Yes, local advertisement and word of mouth can get you a long way in your business. But to grab your potential customers, you need a website. In that case, if anyone wants to see your service, you can tell them to Google your restaurant name. Cool Right!
So, today we’re going to learn about How to Create a Restaurant Website in WordPress without wasting any time.
How to Create a Restaurant Website in WordPress: A Complete Guideline for Beginners
There are several platforms to choose from, but the easiest way to build a website is WordPress. Not only that, you can customize your website at any time when you want and make your website much more performing by using different types of Plugins. As a non-techie, you can easily drag and drop every content of your website.
So, without wasting your time, let’s learn How to Create a Restaurant Website in WordPress.
Buy a Domain name & Web Hosting
At the very first, you need a domain name that contains your restaurant name. Choose a unique domain name that holds your restaurant name. But to place your website in the cloud, you need a server, right? Here the matter of hosting comes. Hosting is the engine of your website. Buy a suitable hosting server that will be good for your services. There will be so many options around you but always remember, better hosting means better services. I prefer Namecheap, Blue Host & Hostinger. Once more, don’t just throw your website up on the cheapest host that you can find. Page load time matters the most, so be aware of that.
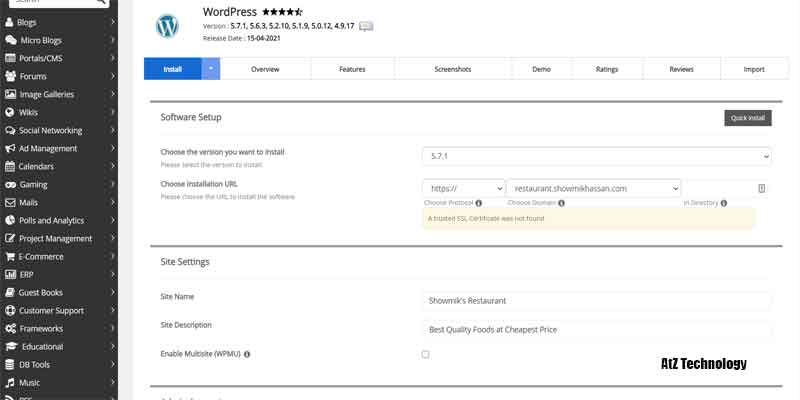
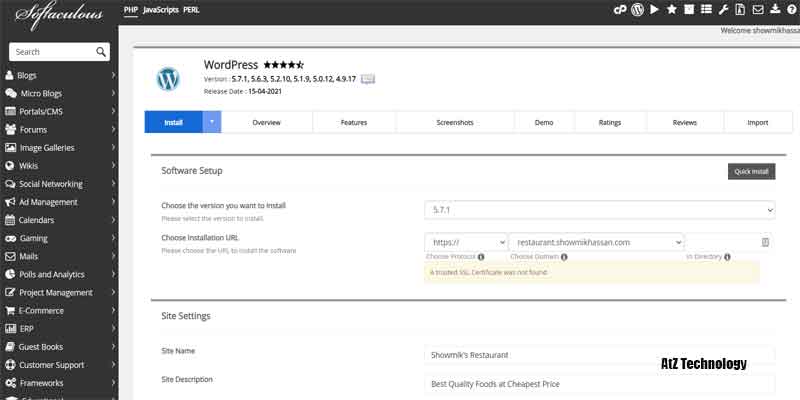
Install WordPress
As we’re building the restaurant websites in WordPress, we need to install WordPress first. You can easily install WordPress from your hosting cPanel. Select and provide all the necessary information, and you are good to go. It will take 1-2 min to install WordPress. After that, it’ll take you to the dashboard of WordPress.
Choose your Preferred Options to Build
There are two general approaches to build your restaurant website in WordPress.
- By installing an All-in-One Theme.
- By installing different Plugins.
You can select as your wish. If you are non-techies, then I’ll suggest you use a premade functional theme which will give you a boost to make your Restaurant Website. It’s almost like Plug and Play. Just put your contents (logo, images & writing) and demos, and you’re ready to go.
Otherwise, you can use plugins and build it from scratch or choose a premade template if you want. Plugins are used to create blocks and sections and add functionalities to your websites. Page builders are now the most popular to build desired websites from scratches. I’ll show you How you can develop your Restaurant website by using the Elementor page builder.
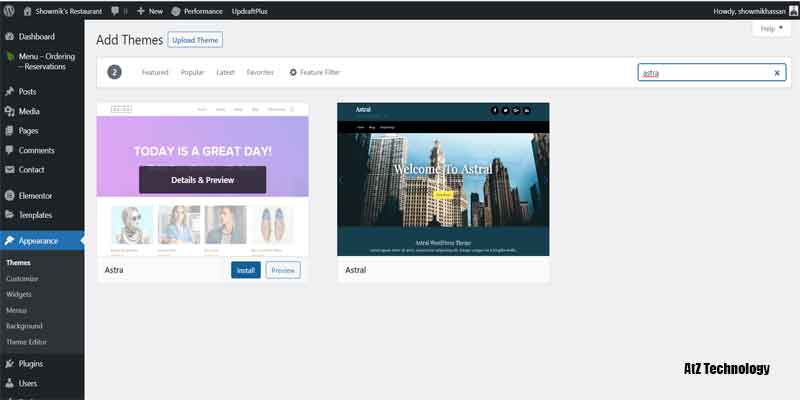
Install Themes & Necessary Plugins
Again, tons of options ahead of you for choosing the theme to install. But I prefer Astra as it has some benefits. We will discuss that later on. I already told you we would use Elementor.
We need recommended plugins like –
- Elementor Pro
- Envato Elements
- Essential Addons for Elementor
- Loginizer
- Menu – Ordering – Reservations
- W3 Total Cache
- Preloader Plus
This plugin is free to use, but it has a pro version that provides more functionalities. I recommend using the pro version of it as it is now one of the most popular page builders. So, install them at once, and we are ready to go.
Must Need for WordPress Restaurant Website
Now I’ll generalize about What a WordPress Restaurant Website Needs. Most of you are already aware of it but let’s make it clear again.
A Menu
This is the most essential part of your website. Without a menu, customers can’t realize what to order from your website. So, your menu must be clean and accurate as you deliver.
Clear Contact/Address Information
Your website must contain an accurate address and contact information. You can integrate Google Map location for betterment. Eye-catching Images: Delicious and yummy-looking Images always make visitors hungry. Use some professional photographs of your foods, make the customer order from your website, or physically visit your restaurant.
An About Page
It’s always been great if your restaurant history is clear to the visitors. You can add why people should visit your restaurant. Also, you can talk about your chefs here.
Food Delivery & Reservation System
If you plan to provide food by parceling and accepting reservations, then you must implement that on your website. You can do this easily through plugins. You can use –
- Gloria Food (Recommended)
- WP Restaurant Manager
- Restaurant Reservations
Social Media Integration
By integrating social media on your restaurant website, visitors can share your menus and other facilities of your restaurant. It’s a great marketing strategy to boost up your sales.
Start Building your Restaurant WordPress Website
So, Let’s design your beautiful website by using Astra Theme and Elementor Pro Plugins. First, you have to install the Astra Theme and then install Elementor Plugin. Then you can subscribe to the pro version of Elementor from there.
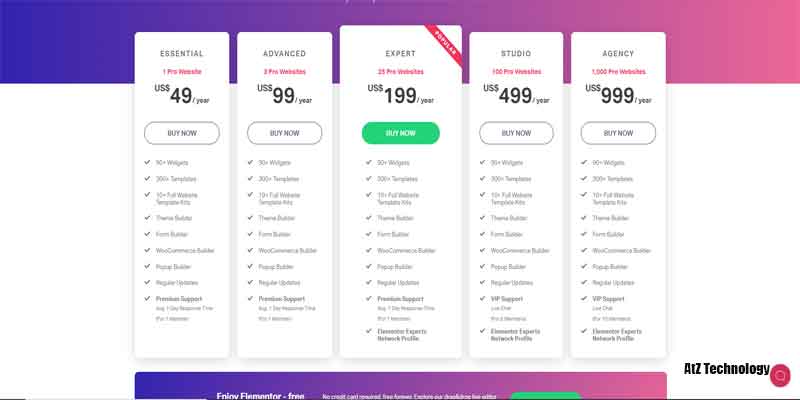
I prefer the Basic plan for a single website. Choose wisely while selecting.
At this point, we’re ready to go.
Customizing your Theme
In the theme settings of Astra, you can customize the layout and global fonts and colors. You can also customize your website’s Header and Footers from that section. From there, you can also create several Menus for your website.
Create a Primary Menu from there and select it as a Header menu. You can also add a Secondary Menu if you want. Besides, you can customize your Footers and other widgets from that customization section.
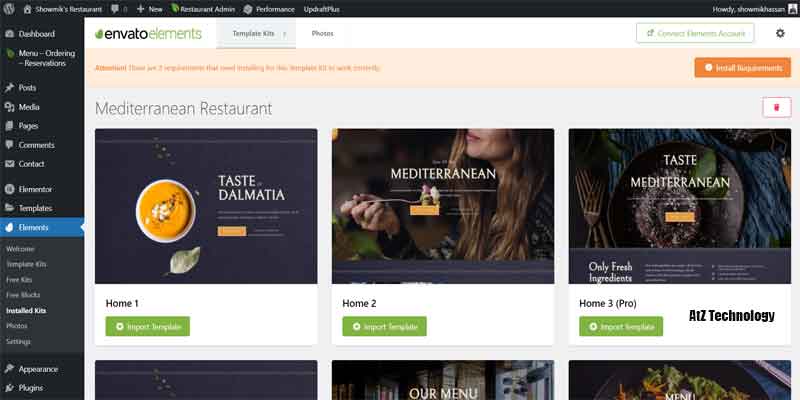
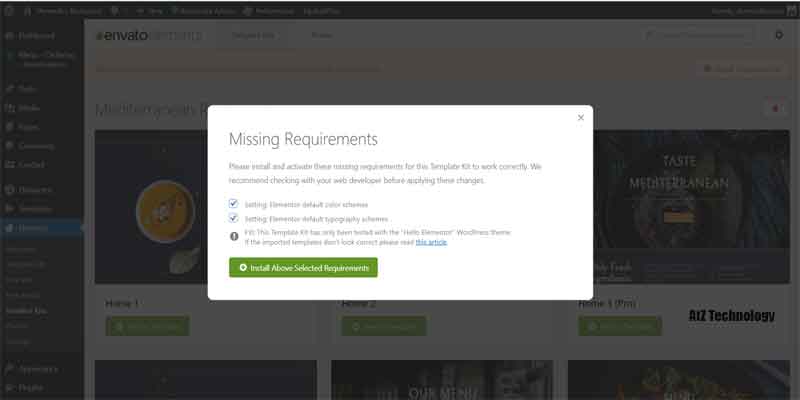
Install Envato Elements Plugin
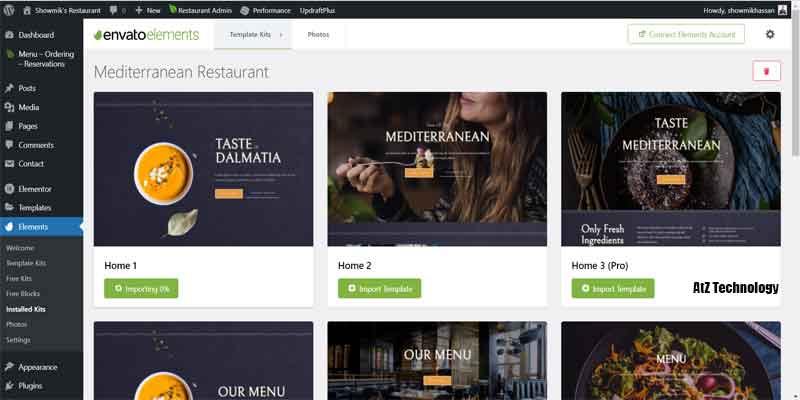
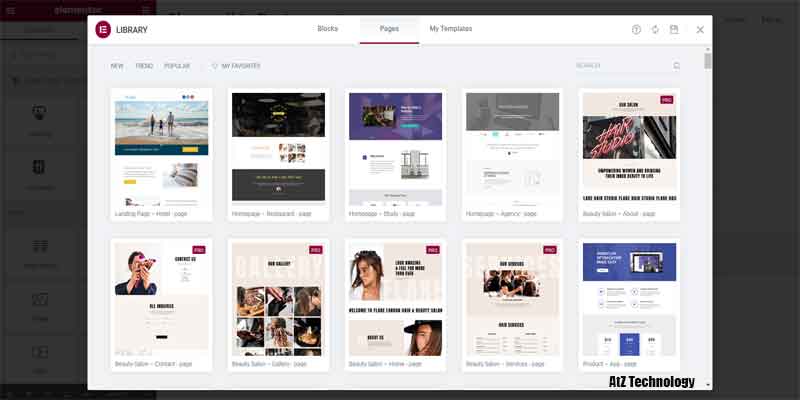
We can import different templates to our website to be much more professional by installing Envato Element Plugin. After installing the plugin, you can import a free template for your restaurant website. We can also build it from scratch, but it will be so time-consuming, But I’ll show you how to create a single page through a plugin. Also, I’ll customize the template through Elementor.

But first of all, go to the Envato Element option and search for restaurant templates. You will find different restaurant templates. I’ll choose the first one. Now Import Home 1, Menu 1, About & Contact Us.

Design your Website using Elementor Pro
You’re always welcome to build your Restaurant website from scratches. For that reason, you need to learn the essential elements of Elementor Pro Builder. It’s straightforward as it’s only dragging & dropping. But in this situation, we will use a premade template as it is more flexible and faster.
Also, it’s elegant and modern as the leading developers of Elementor develop it. Then you have to go to the template library section from the WordPress Dashboard menu. There are lots of pre-made templates. You can import that layout from there too. But you know we did it already, so nothing to worry about.
Create Pages on WordPress
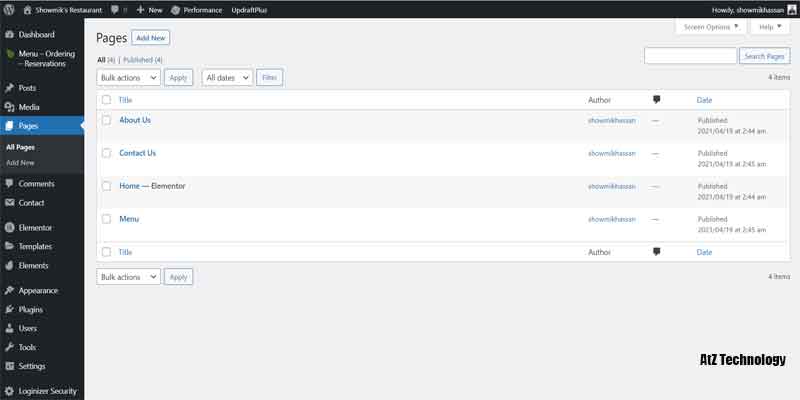
As you’re making a Restaurant Website, you don’t need to create more pages. As we already learn what a Restaurant Website needs. So, create 4 pages like – Home, About Us, Menu & Contact Us. And I think it’s enough for the beginning, but you can add a Chefs Page if your Chefs are Much more professional than the others remain. But it’s up to you.
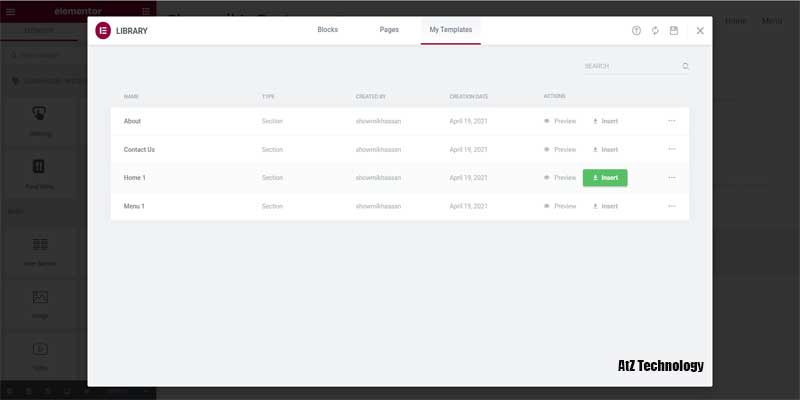
Now, Create and publish every page and edit with Elementor. Click on Add Template and go to my template tab. Here you will find those templates you imported last time. Now insert the specific template for specific pages. And you’re ready to go.

Customize your Website
Once you successfully import every template content, you can easily customize your website look and add/edit its contents. By using Elementor Pro, you can drag and drop different modules and sections into your website layout.
But let me show you how to create a restaurant website in WordPress from scratch. I’ll show you how you can design a single page with Elementor Pro. Let’s go through it.
Build a Page from Scratches
So, First, you need to create a test page. Publish it and click on Edit with Elementor.

Now you will see a plus button and when you click on that structure section will appear in front of you.

Then you can choose different types of sections from there. Choose a single-column section. We are going to make a hero section. So, there will be banners and sliders in front of the page.
Hero Section
Now click on the six dot button, and the edit section option will be open.

From the left side panel, you can customize your section layout easily. You can make it full width or boxed and set the height of the section. I’ll make the entire section width and keep the minimum height 90vh. Also, make the Stretch Section button Yes.

This will make the banner stretched. Now, click on Update, and your progress will be saved.
After that, Go to the Style tab, and from there, you can add background images or videos, or colors. You can add multiple images if you want. I’ll choose the slideshow option and upload some photos and select them for the slideshow. Also, keep on the ken burn effect for better visuals and add a background overlay of 0.7. Choose your preferred images and upload them or you can hire a photographer for them.


Now, click on the 9 dot button, and you’ll see different elements or widgets, whatever you call them. There are so many elements you can use. You can play around with it. But for now, we will select an Inner Section. Then drag it onto the column.

Now, you will see a placeholder for a dummy image. So choose an image from the left section. A png image will be a better option. Then on the right column, add a heading element and text editor element. Now edit your text and change the typography from the style tab. Make the heading text color #fff which means white. And change the font style as you want them to and change its width and size.
You can also change the column width by dragging the centerline between two columns. Make the width ratio 43:57%. Now hover over the 2nd column and click on it. Make the vertical-align middle. So, our hero section is done. Well done.

About Section
Now again under the hero section, add a 2 column section. Make the height min-height 70vh.


Now on the right column grab an image element, and on the left, drag a heading and text editor elements. It’s like the previous, you know. Everything is almost the same, but you need to play around with all the elements and design tools.
Now edit the style of the heading. Change the font and weight. And also, make sure that the font is Dark. Otherwise, it’ll not show up on the white background. Now change the text typo and write your desired content. You can hire a content writer for that or you can make your content by yourself.

You can also add your signature image underneath the content to make it more professional. Now I’ll teach you how to add margin and paddings. Click on the image of the sign and go to the advanced tab. Now you will find the margin and padding section. Now click on the link button and unlink all 4 sides. From the box of the right-left top bottom, you can add custom margin and padding.
Add -35px margin on the top. It will look much better than that. You can also add padding if you want, but in this section, it looks great. So, our about section is done for now.


Menu Section
Let’s head over to our menu section. In the menu section, we will add 3 menu items. But to make this section look great, I’m going to add another plugin. Search for Essential Addons for Elementor and install and activate the plugin from the plugin section. Now click to the next and click on finish until the end and then come to the page editor again.


Now again add a one-column section and make the min-height 400px. Now drag a header element and design it as the same as about us.
You can also copy the about us heading and also paste it into the section. Now edit the menu as Our Menu and from the bottom make it middle align.

From the element section, you will find some new elements as we installed the Unlimited Elements plugin. But First, you need to save your progress and refresh the page; now, from the elements section, search for a filterable gallery element. Drag it underneath the heading section. Make the grid style Grid, Layout Card, Link to None. Now from filterable content, disable the filter.

Under that, you will find gallery items, and from here, you can edit your menu content and add images. Now add your menu content and pictures. From the style section, you will find Item Card Style, then change the alignment to the middle. So, for now, the menu section is done.

Also, add a full menu button under that section by dragging the Button element. Customize the button and if you have any specific link in mind, then place it. You can change the hover color and typography of the controller.

Drink Menu Section
Let’s first add something new. I’ll teach you how to add a parallax image background with a heading. So, add a single column section, then make the min-height 70vh. Now from style, Add a background image.

Then select the attachment fixed, repeat no-repeat, and size cover. Now insert a heading and change its typo. Make the font style Roboto slab, size 60, weight 600, and transform Uppercase.

Now, add another one-column section and add a heading into it again. You can again copy and paste the heading from another section. Name it as House Special, and center align it. Now copy 1 black heading element and paste it as style onto the last House Special Heading. This will transform your heading style. Now add an inner section element under it, and on both sides, drag the text editor and write about your drink menu. And That’s it. The Drink Menu section is done.

Now I almost show you the most popular way to build a page from scratch, but there are so many things to learn. But I hope you can create a beautiful page just by following my commands.
Design a Menu Page
On the menu page, you can show the all-available menus you want to offer to the customers. So, it must be eye-catching and glamorous to the buyers. You can use image grids and lists of your items and can include the price there.
Implement Online Reservation System
As your business develops, you’ll need to add an online reservation framework to your site for clients to book a table in your Restaurant.
Dissimilar to holding tables through calls, the online reservation framework works naturally whenever it’s set up. In light of the plugin you use, you can add occasions, opening and shutting time, and even square the appointments physically. Interestingly, it creates email notices for you and your client. As an eatery proprietor, you can affirm or dismiss a booking dependent on the accessibility of tables.
Best of all, you can utilize a WordPress Plugin like Start Booking to add the online reservation highlight on your site in a couple of snaps without composing code. I prefer Gloria Foods for the order menu and reservation system implementation.
Install Gloria Food Plugin
By installing the Gloria Food plugin, you can implement the order and table reserving system very easily.


You can set your restaurant location on the map to deliver the food to the customer when they order from your website. You can schedule your preferred restaurant opening time and closing time also.
As well as you don’t need any extra devices for that. You can easily control your order from the Gloria Food App. You can see all the order details and reservation details from the app dashboard.
Customers can go through some easy conditions during the order section. By doing a complete setup, you are ready to go with your brand-new Restaurant Website.
So let’s dive deep into this plugin. First of all, after installing the plugin, you will get a side option of Menu-Ordering-Reservation. Go there, and you will find 3 setup option –
- Set up your restaurant profile
- Insert the menu
- Publish on your website

Set up your restaurant profile
Click on setup your profile; then, it will redirect you to the Gloria Food admin panel. From there, insert the correct information into the form and click next. Now insert your Domain Name and click next. Select 3 Restaurant cuisine and again click next. Then go to your mail and confirm your email. It will validate your account on Gloria Food. Pick up option, yes.


Now, You can add your delivery location from this panel. Go to the right top corner and click on the add zone. You can add different zones and charge differently within the range. You can also drag the circle and change the range. And also add a minimum checkout price for each range. Also, you can add different area shapes into it.


Also, add table reservations and change the settings. Then add the opening hour for your restaurant. Click yes to accept orders later and customize the settings. Skip the currency and taxation section and click next. Then customize your payment method. Select all if you want new experiences.


After all the things you have done your phone will get an app link then click on the link on your mobile device and install the app. So all set. From there you can receive an order and give the approximate time to deliver the food.


Insert the menu
Now go to the dashboard again and click on the insert menu item. From there, you can add different food categories. Insert your food categories and insert images. Then edit your menu item details and add pictures for those items. You can also add the prices.

From the right top corner, you can add different add ons for your menu items, like cheese for burgers, drinks, fries for snacks, etc. Add them if you have such kinds of options in your restaurant. Drag them to your menu, and the choices option will be applied. That’s the way to add items in your menu section.
Publish your Website
By clicking on publishing your website, you will find two buttons –
- Menu & Order
- Table Reservation

You can put those shortcodes anywhere on your website, and your menu and reservation option will work properly. So, the plugin section is done for now.
Create a Header
First of all, we create a menu from the Appearance>Menu, then we create a new menu named primary menu. Display location will be the primary menu. Now click on the create menu. From the left side, you can select the pages you want to show in the menu. You can drag them and rearrange them easily. Now click on the save menu. Don’t select the test page as we create it for practices.


Now go to Appearance>Theme>Customize, then go to the header builder. From there, you can build or customize your header design. Go to the logo and change your logo from there also on the site title display. Make the logo width 150px.

Come back from there and go to the primary menu. Now from there, you can design the typo and also add hover animation and so on. Now finally click on publish after the customization.
Create a Contact Us Page
A Contact us page is a significant piece of any site. This page will be tremendously helpful to your expected clients to discover where your restaurant is found and connect with you. On your get in touch with us page, you can add the location, area map, and other contact subtleties.
The Contact Us page ought to likewise incorporate a structure for clients to compose their feedback or ideas. I prescribe utilizing the WPForms plugin to add the contact structure in WordPress.
Also, you can likewise add online media icons and show your authority on social pages like Facebook, Twitter, Instagram, and so on.
Maintain your Blog Page
By posting new blogs simultaneously, you can boost up your marketing strategies and generate leads also. You can post food-related blogs and also inform people about their health and nutrition. It’ll help you to rank higher on your website also.
Promote Your Restaurant Website
At the point when your site is prepared, the following thing you need to do is to advance it online. There are a few WordPress promoting plugins that help you spread the word out. How about I investigate a portion of the helpful plugins you can use to expand the reach and get more traffic on the web.
Constant Contact
It’s extraordinary compared to other email showcasing administrations. It permits you to send bulk messages to your subscribers and standard clients about those daily deals, new restaurant menu, and more in a couple of snaps.
MonsterInsights
This is the best Google Analytics plugin that you can use to follow your guests. It shows your famous pages directly in your WordPress dashboard, so you can improve your website’s client experience and lift traffic.
OptinMonster
It’s the best transformation enhancement module. With shocking pop-ups, the module supports email information exchanges, online reservations, or whatever other attractive activities that you need your clients to take on your site.
Conclusion
Opening your Restaurant is exciting. However, you need benefactors to remain in business. A restaurant website is a straightforward and minimal effort showcasing strategy, particularly if you make yours with WordPress.
This post strolled you through five stages for making your restaurant website:
- Pick a facilitating supplier and area name.
- Introduce WordPress Core.
- Select a WordPress Restaurant subject.
- Improve your website with plugins.
- Important and must-have key pages for your website.
I trust this article assisted you with figuring out how to create a Restaurant Website in WordPress. For more exciting articles like this, please stay with us.